

If you’re in the business of remodeling or have an old house in need of a facelift, you know that a clean, smooth wall finish can make all the difference. For this project, we took on a classic South Philly row home renovation, giving it the quality restoration it deserved. Here’s a step-by-step look at the transformation, complete with before and after shots to show just what expert plastering can achieve.
Step 1: Removing the Existing Tiles
Before any restoration work, the first step is to remove the existing tiles. In this South Philly row home, the old tiles were taken down to expose the brick underneath. This phase can be dusty and demanding, but it’s crucial for creating a solid foundation. The raw brickwork beneath gives a sense of the home’s historic character, but it also reveals the amount of work needed to bring it back to life.
Step 2: Prepping the Patch
With the tile removed, it’s time to patch up the surface and prep it for plastering. The exposed areas are examined for any cracks, gaps, or inconsistencies that may affect the wall’s smoothness.
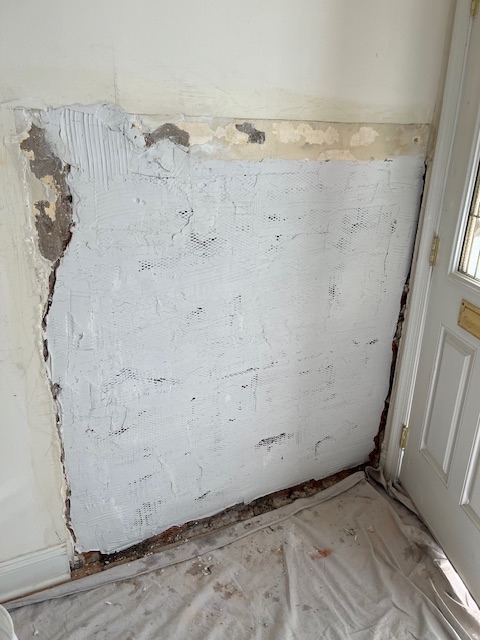
Step 3: Installing Metal Lath
Once the surface is prepped, we installed a metal lath over the brick. This metal mesh is essential, as it strengthens the adhesion of the plaster to the wall and provides a textured base for the layers to hold on to. Metal lathe is especially crucial for older homes where walls can shift slightly over time.
Step 4: Applying the Scratch Coat
With the metal lath in place, we applied the scratch coat. This first coat creates a rough texture that helps subsequent layers bind effectively. We make sure that this layer is evenly distributed, covering the entire lath surface. The scratch coat is then “scratched” lightly to create grooves for the next coat to adhere to.
Step 5: Adding the Base Coat
After allowing the scratch coat to set, we moved on to the base coat. This layer is applied over the scratch coat to further build up the wall’s surface, smoothing out any imperfections along the way. The base coat also starts to give the wall a more uniform look, hiding the roughness of the scratch coat beneath.
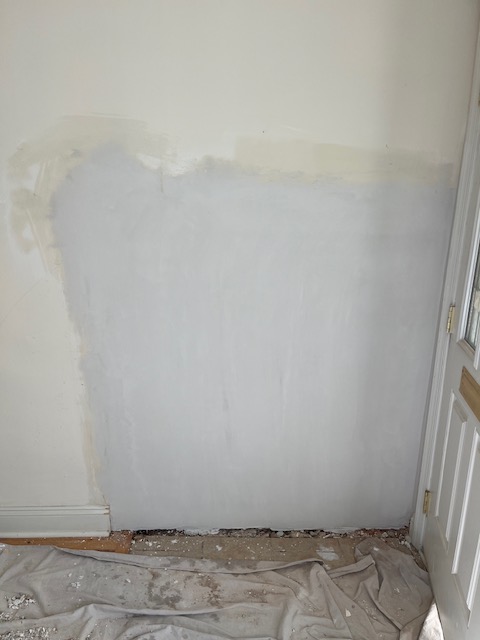
Step 6: Finishing with a Smooth White coat
The final touch is the smooth white coat finish. This step transforms the wall into a beautiful, paint-ready surface. Using a skillful troweling technique, we apply the finish coat with care, ensuring it’s flawless and smooth. The wall now has that classic, clean look you’d expect from a top-quality plastering job.
The Final Look: Smooth and Seamless
The results speak for themselves! This South Philly row home now boasts a wall that is not only structurally sound but also stunningly smooth and ready for any finishing touches the homeowners desire. By going through each essential plastering step—from prep work to the final troweling—we ensure that this restoration would stand the test of time.
📸 ***Before and After Comparison: Witness the transformation from exposed brick to a beautiful, flawless finish.*

—
Thinking of a Similar Renovation?
This South Philly project is just one example of how expert plastering can renew an older home’s charm. If you’re considering a similar restoration, reach out to a trusted plastering contractor who understands the importance of each stage. With the right approach, even the oldest row homes can feel brand new.
